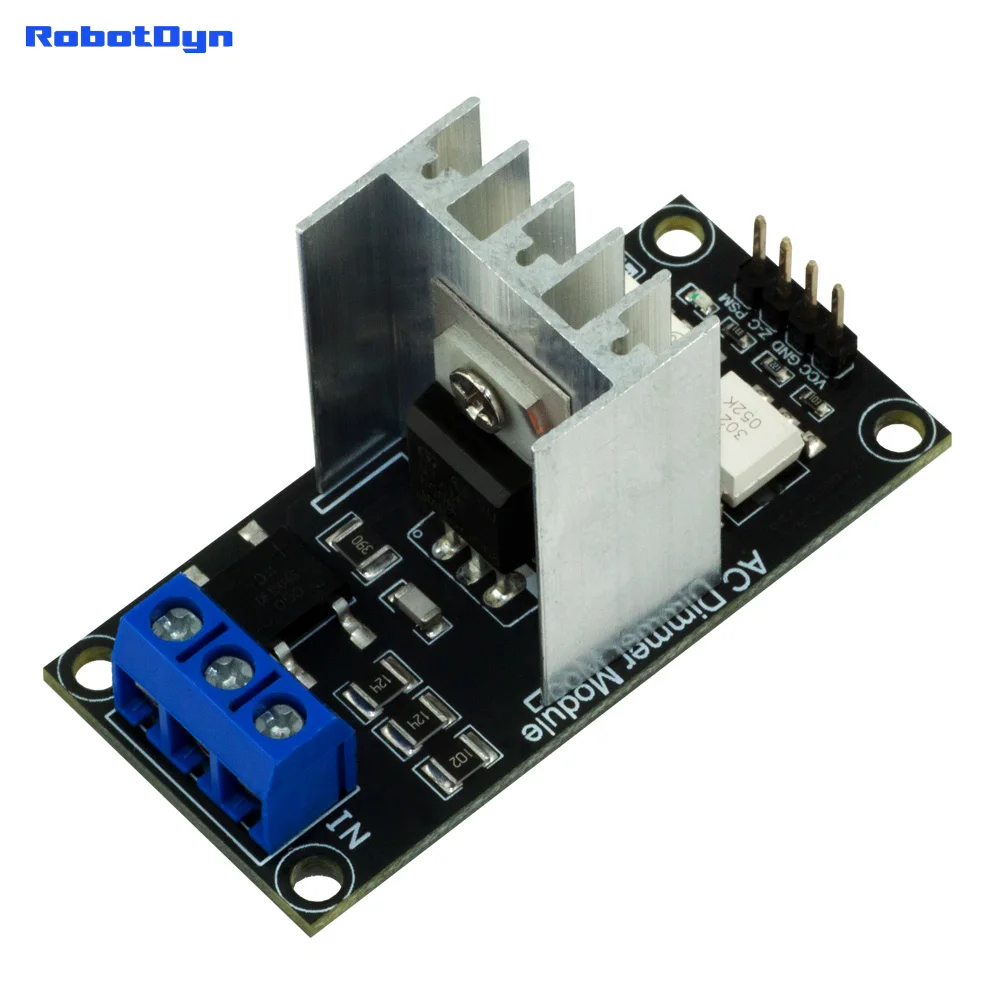
AC Light lamp dimming and motor Dimmer Module, 1 Channel, 3.3V/5V logic, AC 50/60hz, 220V/110V - 600V
RBDIMMER.COMTechincal support, library, community support for AC DimmerAC Dimmer Module for PSM control, 1 Channel, 3.3V/5V logic, AC 50/60hz, 220V/110V~600VProduct OverviewThe AC Dimmer is a DIY module—not a finished device—that you integrate into your project by connecting it to your microcontroller. Designed to regulate alternating current (AC) voltage, it safely handles up to 4~24A. Originally designed for smooth control of lamps and heating elements—not merely simple on/off switching—this v
Need help before you buy?
Call iBuyRobotics for product guidance, compatibility questions, bulk orders, or support.
(855) I-BUY-ROBO (855) 428-9762RBDIMMER.COM
Techincal support, library, community support for AC Dimmer
AC Dimmer Module for PSM control, 1 Channel, 3.3V/5V logic, AC 50/60hz, 220V/110V~600V
Product Overview
The AC Dimmer is a DIY module—not a finished device—that you integrate into your project by connecting it to your microcontroller. Designed to regulate alternating current (AC) voltage, it safely handles up to 4~24A. Originally designed for smooth control of lamps and heating elements—not merely simple on/off switching—this versatile module also supports adjustable operation for fans, pumps, air purifiers, and more.
This dimmer is especially useful for smart home projects. With our comprehensive tutorials and user guides, you can build a fully customized solution. For example, you might:
Adjust lighting: Gradually turn lights on or off to create a comfortable ambiance.
Automate your home: Connect the module to cloud services like HomeAssistant or even control it with voice assistants.
Save energy: Program schedules for turning devices on and off, reducing energy consumption.
We provide extensive documentation and instructions not only for Arduino but also for other platforms. You can find guides on using the ESPHome component for integration and automation through HomeAssistant, as well as detailed instructions for connecting and configuring the Tasmota application. These resources ensure that whether you're using Arduino, ESP32, or another platform, you have all the support you need.
Specification
Power | up to 400V/600V (4A~24A) |
AC frequency | 50/60 Hz |
TRIAC | BTA16 — 600B / BTA24 — 600B |
Isolation | Optocoupler |
Logic level | 3.3V/5V/12V |
Zero point | Logic level |
Modulation (DIM/PWM) | logic level ON/OFF TRIAC |
Signal current | >10mA |
Environment: |
|
ROHS3 | Compliant |
AC TRIAC Dimmer Module
🔌 CHOOSE YOUR INTERFACE
Feature | Standard (Phase Control) | DimmerLink (UART/I2C) |
Interface | Zero-Cross + Gate signals | UART (115200) or I2C |
Library Required | Yes (rbdimmerESP32.h) | ❌ No library needed |
Code Complexity | Interrupt handling, timers | 3-4 bytes command |
Flickering | Depends on code quality | ✅ Guaranteed flicker-free |
Platform Support | ESP32, Arduino (with library) | Any MCU with UART/I2C |
Logic Levels | 3.3V, 5V | 1.8V, 3.3V, 5V |
Best For | Advanced users, custom timing | Beginners, quick integration |
⚠️ HOW TO IDENTIFY YOUR VERSION
When ordering, select carefully:
You Selected | You Will Receive | Interface Pins |
4A Standard / 8A Standard | Dimmer with Phase Control | VCC, GND, Z-C, DIM |
4A DimmerLink / 8A DimmerLink | Dimmer with built-in controller | VCC, GND, TX/SDA, RX/SCL |
🎯 WHICH VERSION IS RIGHT FOR YOU?
✅ Choose STANDARD (Phase Control) if you:
Already use rbdimmerESP32 library in your project
Need lowest possible cost
Want direct hardware control
Building multi-phase systems
Experienced with interrupt-based programming
✅ Choose DIMMERLINK (UART/I2C) if you:
Want plug-and-play simplicity
Need guaranteed flicker-free operation
Using Raspberry Pi, Orange Pi, or any Linux SBC
Working with platforms without dimmer libraries
Building smart home with HomeAssistant/ESPHome
Want to control via USB-UART adapter from PC
Prefer minimal code (literally 5 lines!)
📋 GENERAL SPECIFICATIONS (Both Versions)
Parameter | 4A Version | 8A Version |
Max Current | 4A | 8A |
Max Power (220V) | 880W | 1760W |
Max Power (110V) | 440W | 880W |
Input Voltage | 110-240V AC, 50/60Hz | |
Control Voltage | 3.3V / 5V (Standard) — 1.8V / 3.3V / 5V (DimmerLink) | |
Isolation | Optocoupler isolated | |
Mounting | Standard 0.1" (2.54mm) pins | |
🔧 STANDARD VERSION — Phase Control Interface
How It Works
The Standard version outputs two signals:
Z-C (Zero-Cross) — pulse at each AC zero crossing
DIM (Gate) — you send trigger pulse to fire TRIAC
Your microcontroller must:
Detect zero-cross interrupt
Calculate delay based on desired brightness
Send precisely-timed gate pulse
Repeat 100-120 times per second
Requires Library
We provide rbdimmerESP32.h library that handles all timing complexity.
dimmerLamp dimmer(4, 2); // Gate pin, ZC pin
void setup() {
dimmer.begin(NORMAL_MODE, ON);
}
void loop() {
dimmer.setPower(50); // 50%
}
Supported Platforms
✅ ESP32, ESP8266 | Full library support |
✅ Arduino Uno/Mega | With limitations |
⚠️ Raspberry Pi | Requires precise timing — difficult |
❌ Most other platforms | No library available |
🚀 DIMMERLINK VERSION — UART/I2C Interface
Revolutionary Simplicity
DimmerLink has a dedicated Cortex-M+ microcontroller built into the dimmer board. This controller handles ALL timing-critical operations internally:
✅ Zero-cross detection
✅ Phase angle calculation
✅ TRIAC firing with microsecond precision
✅ Automatic 50/60Hz detection
✅ Multiple dimming curves
You just send simple commands!
No Library Required — Ever!
Arduino Example (I2C):
void setup() {
Wire.begin();
}
void loop() {
Wire.beginTransmission(0x50);
Wire.write(0x10); // Brightness register
Wire.write(50); // 50%
Wire.endTransmission();
delay(1000);
}
Python Example (Raspberry Pi):
bus = SMBus(1)
bus.write_byte_data(0x50, 0x10, 50) # Set 50%
Even from Terminal (Linux):
DimmerLink Key Advantages
🔇 FLICKER-FREE | Hardware handles timing — impossible to flicker |
📚 NO LIBRARIES | Works with ANY programming language |
🌐 UNIVERSAL | Arduino, ESP32, Raspberry Pi, STM32, PIC, anything! |
⚡ 1.8V-5V Logic | Direct connection to any MCU |
📊 3 Dimming Curves | LINEAR, RMS (incandescent), LOG (LED) |
🔄 Auto Frequency | Detects 50/60Hz automatically |
🔌 Dual Interface | Switch between UART and I2C anytime |
Supported Platforms (ALL of them!)
Platform | UART | I2C | Logic Level |
Arduino Uno/Nano/Mega | ✅ | ✅ | 5V |
ESP32 / ESP8266 | ✅ | ✅ | 3.3V |
Raspberry Pi 3/4/5 | ✅ | ✅ | 3.3V |
Orange Pi / Banana Pi | ✅ | ✅ | 3.3V |
STM32 Blue Pill | ✅ | ✅ | 3.3V |
Raspberry Pi Pico | ✅ | ✅ | 3.3V |
ATtiny / nRF52 / MSP430 | ✅ | ✅ | 1.8V |
USB-UART adapter (PC) | ✅ | — | Any |
💡 APPLICATION EXAMPLES
🏠 Smart Home
Both versions work with HomeAssistant. Standard uses ESPHome dimmer component, DimmerLink uses simpler I2C/UART component.
💡 Lighting
Incandescent (RMS curve), Dimmable LED (LOG curve), Halogen (RMS curve)
🔥 Heating
Boilers, water heaters, 3D printer heated beds, industrial heating elements
⚙️ Motors
Universal/brush motors (drills, mixers), fans. ⚠️ NOT for induction motors!
⚡ QUICK COMPARISON: Code Complexity
Setting 50% Brightness
Standard Version (ESP32 with library)
dimmerLamp dimmer(4, 2);
void setup() {
dimmer.begin(NORMAL_MODE, ON);
}
void loop() {
dimmer.setPower(50);
}
Requires: Library installation, correct pin configuration, understanding of interrupt modes
DimmerLink Version (ANY platform)
Wire.write(0x10);
Wire.write(50);
Wire.endTransmission();
Requires: Nothing! Just 4 lines, any I2C-capable device
❓ FAQ
Q: Can I use Standard version with Raspberry Pi?
A: Technically yes, but very difficult. Raspberry Pi OS is not real-time, causing timing issues and flickering. DimmerLink is strongly recommended for Raspberry Pi.
Q: Is DimmerLink compatible with existing rbdimmerESP32 projects?
A: No, they use different interfaces. DimmerLink uses UART/I2C commands instead of phase control signals.
Q: Can I switch DimmerLink between UART and I2C?
A: Yes! Send a command to switch interface. Setting is saved in memory.
Q: What if I need to control multiple dimmers?
A: Standard: Each dimmer needs separate GPIO pins
DimmerLink (I2C): Up to 100+ dimmers on same 2 wires (different addresses)
Q: Which version has less flickering?
A: DimmerLink — zero flickering guaranteed. Standard version depends on your code quality and MCU performance.
📦 PACKAGE CONTENTS
Standard Version
1× AC Dimmer Module (4A or 8A)
Pin headers (soldered)
DimmerLink Version (UART/I2C)
1× AC Dimmer Module with DimmerLink controller (4A or 8A)
Pin headers (soldered)
️ SAFETY WARNING
This is a DIY module for experienced users
Works with dangerous AC mains voltage (110-240V)
Proper isolation and enclosure required
Follow local electrical codes
Not for use by children
Choose wisely: Standard for advanced timing control, DimmerLink for simplicity and reliability!
1. Dimmer module 8A
New dimmer module for load AC power 8A-400V. With RC filter. Dimension: 28.5mm(1.12")x57mm(2.24")


-----------------------------------------------------------------------------------------------------------------------------------------------------------------------------------------------------------------
2. Dimmer module 4A
Small size DIY dimmer module for load AC power 4A-400V. With RC filter. Dimension: 16mm(0.63")x50mm(1.97")
Suitable for power load less 800W: Lamp, a small fun, water pump, tool.

-----------------------------------------------------------------------------------------------------------------------------------------------------------------------------------------------------------------
Dimmer Module embedded, 1 Channel, 3.3V/5V logic, 16A, 600V


=====================================================================================================

.
Related Products
Other products in Robots that you may find useful.